CIA Through the Eyes of an International Student
Being at the world’s best culinary college is a completely new experience for a person like me, an international student.
Back when I was completing my bachelor’s degree at India’s prestigious Welcomgroup Graduate School of Hotel Administration (WGSHA) in Manipal, I was in constant touch with my friend Harshaal Shyam, who was at CIA at that time. I used to ask him what the college was like, if it was like WGSHA or completely different? He would share his experience, and it would make me more eager to come to this college. Trust me, he has been my mentor ever since my WGSHA days, and I’m blessed to have him!
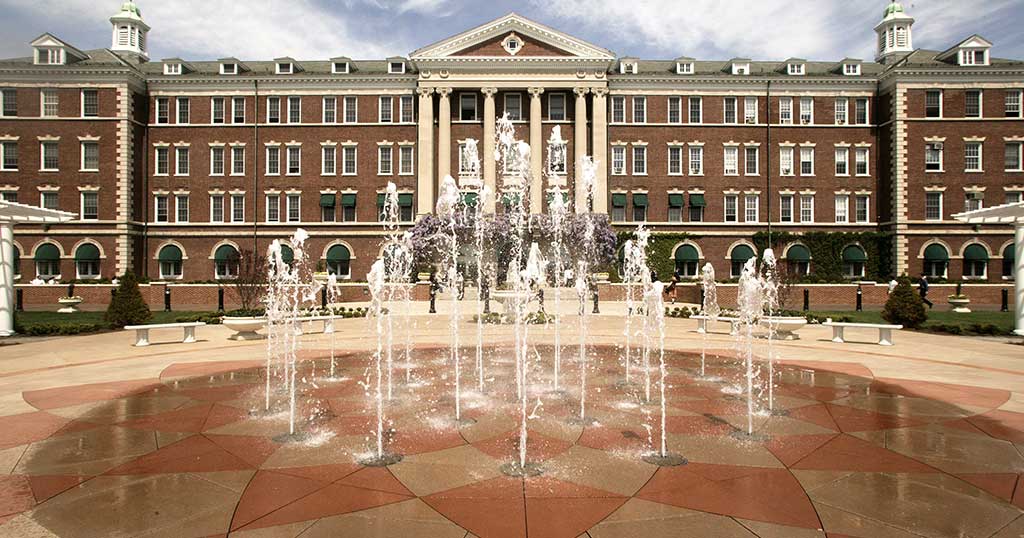
And now that I’m at the Culinary Institute of America’s main campus at Hyde Park in New York State, some of my former batchmates ask me the same questions about what it feels like to be at such an honorable culinary college. What are classes like, course descriptions, fee structure, etc.? So today I’m going to take you behind the scenes of the lessons I took, the ones I’m taking now, and the ones I’ll take in the future, and discuss all the parameters of being an international student here.
Time to Apply
There are three intakes in a year—spring (January), summer (April/May), and fall (September). You can fill out the application form at Apply Online, or you can call up any of the admissions representatives available at Admissions Team page. Once you fill in the application form, you will receive a set of three essay questions in which you need to talk about your passion for food, what food means to you, and why you want to attend this college.
Also, CIA provides scholarships for an alumni referral, so if you know any CIA alumni, ask them to write a recommendation letter for you for that scholarship. There are other ones too. The information about them will come from your financial advisor.
Once you fill out the form, finalize the other formalities, and submit it back to the college, you await their acceptance mail saying, “Hey, you have been accepted at CIA.” Trust me, it was a joyful moment for me!
The Visa Process
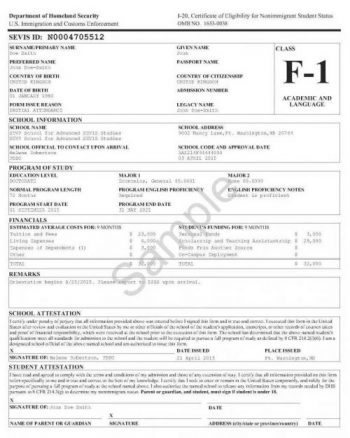
Then from there, the visa process begins, and you have to submit an admission confirmation fee. From there, you will get in touch with the International Students office, which will be guiding you with your I-20 Form and visa. There will be a link to your e-mail from the International Students office where you need to fill out the details for the Form I-20, and you’ll receive the form in person from a FedEx or DHL courier along with your acceptance letter and kit. So once you have received the form, you begin the visa (F-1) process at the U.S. Embassy or Consulate.
Here’s what I needed to do when I started applying for a U.S. visa:
- Pay the SEVIS fee to the Department of Homeland Security.
- Print the receipt and keep it with the documents you’re carrying for the U.S. visa interview.
- Apply for a U.S. Visa Form.
- Apply for a visa in India.
Then there were a number of steps to follow:
Step 1
If you’re a nonimmigrant visa applicant, determine your visa type by reading Common Nonimmigrant Visas. Each visa type explains the qualifications and application items. Choose the visa type that applies to your situation for students; the Category is F-1.
Then complete the Nonimmigrant Visa Electronic Application (DS-160) form. Be sure to read the Guidelines for Completing the DS-160 Form carefully. All information must be correct and accurate. Once the form is submitted, you cannot make any changes. If you need assistance, please consult an immigration lawyer or translator. The call center cannot help you complete your DS-160. You will need your DS-160 number to book your appointment.
Note: If you’ve been denied a visa previously, please complete a new Nonimmigrant Visa Electronic Application (DS-160) form.
Step 2
Once you have determined the correct visa type and completed the DS-160, you must pay the visa fee. The visa fee page lists the visa types and correlating visa fee in U.S. dollars and native currency.
To pay your visa fee, read the Bank and Payment Options page. This page explains how to make your visa fee payment. You will create a profile and must keep your receipt number to book your visa appointment.
Step 3
You are almost ready to schedule your visa appointment! You will need to log in to your profile with the same credentials you used to pay your visa fee. Once you are in the system, you will see your dashboard.
Click on “Schedule Appointment” on the left side of the menu, which will initiate the process of scheduling your appointment.
You must schedule two appointments:
- First, schedule your appointment at a Visa Application Center (VAC. This will allow you to go to one of the five Visa Application Center locations to have your fingerprints and photo taken. This appointment must be at least one day before your visa interview appointment at the Embassy or Consulate.
- Second, schedule your visa interview appointment at the Embassy or Consulate.
You will need three pieces of information to schedule your appointment:
- Your passport number.
- The application fee receipt number.
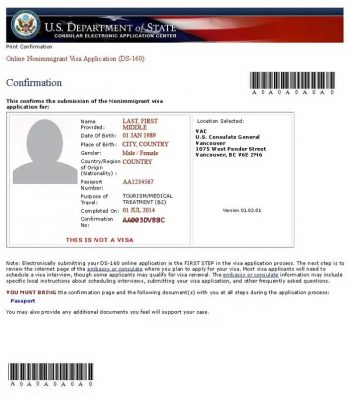
- The 10-digit barcode number from your DS-160 confirmation page.
As you go through the process, you will be able to select your visa type, enter personal data, add dependents, select your document delivery location, confirm visa payment, and schedule your appointment.
Step 4
For your Visa Application Center (VAC) appointment, you will need to bring:
- A passport valid for travel to the United States with validity dates at least six months beyond your intended period of stay in the U.S. (unless country-specific agreements provide exemptions). If more than one person is included in your passport, each person desiring a visa must apply.
- Your DS-160 confirmation page.
- Your appointment confirmation page.
- One photograph as per U.S. visa specifications if the applicant is under 14 years of age. See the Photos and Fingerprints page for more details.
Step 5
Following your visit to the Visa Application Center to have your photo and fingerprints taken, you will then visit the U.S. Embassy or Consulate on the date and time of your visa interview. You will need to bring:
- A printed copy of your appointment confirmation letter
- Your DS-160 confirmation page (see sample below) stamped at the VAC
- Your current and all old passports
- Supporting documents as per your visa type
- Valid passport
- Form I-20
- Bank statements
- Acceptance letter from CIA
- SEVIS confirmation receipt
- Other documents like your previous degree, mark-sheets, etc.
After the interview, whatever the outcome is, you need to inform the International Student office at the earliest for processing from their end.
On Your Way to CIA
Once you receive your visa and an attached passport from the Embassy, you book your ticket to either New York’s John F. Kennedy or LaGuardia Airport. Once you arrive at the airport, you can use a local SIM card. If you don’t have one, a preferred card is AT&T, which will cost you $50–70. Don’t take a yellow taxi to reach the campus because they price on average between $300–400 (20,000-30,000 INR). It’s better to take Uber, which shouldn’t cost you more than $150–200. Just know that Uber in the U.S. doesn’t take cash; they only charge from your debit or credit card.
You can also take the ride to Grand Central Station—which will cost about $80 from JFK—and then you take a train ride from there to Poughkeepsie, which costs about $18. Once you have arrived at the Poughkeepsie Train Station, you can ride the Uber to CIA campus, which will cost you around $19–20. Sound tiring? Trust me, it is!
Once you arrive at the campus, the Residence Life staff will move you to one of our four residence halls: Angell, Dargan/Rovetti, Hudson (if you’re under 21), or Rosenthal. You then go through the formalities for room move-in with one of the resident assistants on duty. As the RA hands over the key, that’s it; you’re all set. By now, you will have received mail from the CIA Welcome Team about your day-long orientation schedule, and the next day you start your program. And yes…welcome to the Culinary Institute of America!
A Full Class Schedule
Here’s how the culinary arts program typically looks, with practical being hands-on and theory being classroom work:
Freshmen Year (Year 1)
Semester 1
- Culinary Fundamentals (14 weeks)—Practical
- Food Safety (6 Weeks)—Theory
- ServSafe Exam (food handlers) will be held at the end of your Food Safety class
- Professionalism and Life Skills (6 Weeks)—Theory
- College Writing (14 weeks)—Theory
- Mathematical Foundation (6 Weeks)—Theory
- Nutrition (6 Weeks)—Theory
- Introduction to Hospitality (6 Weeks)—Theory
Semester 2
- Introduction to Food Systems (4 weeks)—Theory
- Meat ID and Fabrication (3 weeks)—Practical
- Fish ID and Fabrication (3 weeks)—Practical
- Modern Banquet Cookery (3 weeks)—Practical
- À la Carte Cookery (3 weeks)—Practical
- Second Semester Culinary Practical and Written (will take place at the end of your À la Carte class)
- High-Volume Production (3 weeks)—Practical
- Introduction to Gastronomy (3 weeks)—Theory
- Introduction to Food Systems (3 weeks)—Theory
- Principles of Menu Management (12 weeks)—Theory
Semester 3
- Externship (Culinary Arts)—for international students it’s 14 weeks
Sophomore Year (Year 2)
Semester 4
- Baking and Pastry Skills (3 weeks)—Practical
- Garde Manger (3 weeks)—Practical
- Cuisines of the Americas (3 weeks)—Practical
- Cuisines of the Mediterranean (3 weeks)—Practical
- Cuisines of Asia (3 weeks)—Practical
Semester 5
- Introduction to Hospitality and Customer Service (3 weeks)—Theory
- Wine Studies (3 weeks)—Theory
- Contemporary Restaurant Cooking (3 weeks)—Practical
- Contemporary Service Management (3 weeks)—Practical
- Formal Restaurant Cooking (3 weeks)—Practical
- Formal Service Management (3 weeks)—Practical
And here’s how the baking and pastry arts program typically looks:
Freshmen Year (Year 1)
Semester 1
- Baking and Pastry Techniques (14 weeks)—Practical
- Baking Ingredients Equipment and Tech (14 weeks)—Theory
- Food Safety (6 Weeks)—Theory
- ServSafe Exam (food handlers) will be held at the end of your Food Safety class
- Professionalism and Life Skills (6 Weeks)—Theory
- College Writing (14 weeks)—Theory
- Mathematical Foundation (6 Weeks)—Theory
- Nutrition (6 Weeks)—Theory
- Introduction to Hospitality (6 Weeks)—Theory
Semester 2
- Basic and Classical Cakes (4 weeks)—Theory
- Hearth Breads and Rolls (3 weeks)—Practical
- Individual Production Pastry (3 weeks)—Practical
- Principles of Design (3 weeks)—Practical
- Café Savory (culinary class) (3 weeks)—Practical
- Second Semester Baking and Pastry Practical and Written
- Introduction to Gastronomy (3 weeks)—Theory
- Introduction to Food Systems (3 weeks)—Theory
- Principles of Menu Management (12 weeks)—Theory
Semester 3
- Externship (Baking and Pastry Arts)—for International students it’s 14 weeks
Sophomore Year (Year 2)
Semester 4
- Contemporary Cakes (entremets) (3 weeks)—Practical
- Chocolates and Confectionery (3 weeks)—Practical
- Advanced Breads (3 weeks)—Practical
- Advanced Baking Principles (3 weeks)—Practical
Semester 5
- Introduction to Hospitality and Customer Service (3 weeks)—Theory
- Wine Studies (3 weeks)—Theory
- Contemporary Restaurant Cooking (3 weeks)—Practical
- Contemporary Service Management (3 weeks)—Practical
- Formal Restaurant Cooking (3 weeks)—Practical
- Formal Service Management (3 weeks)—Practical
You graduate the day after you finish your Formal Service Management class.
You can access all your classes at Moodle Site for CIA. If you pass the Math Challenge exam prior to Culinary Math, you can be exempted from that class. You may also be exempted from some of the theory classes if you had them in your previous bachelor’s or equivalent degree program depending on the grade you received in those classes.
Plenty to Do on Campus
Besides classes, you can be a part of various clubs and work opportunities on campus. There are plenty of fun activities taking place under the observation of Dr. J.J. Manley, associate dean for campus life and student development, and Nathan Flintjer, assistant director for student life.
You can join the Global Spoon Club for international students. You can write for the campus newspaper La Papillote, overseen by Danielle Schmalz, coordinator of student leadership and programming.
To work on campus as an international student, here’s the process and steps you need to follow:
- Look for a job on campus and talk to your employer.
- Upon acceptance, a letter will be issued to you by the employer, which you need to take to the Student Enrollment office in Roth Hall on the third floor.
- You will receive a letter from the in-charge at Student Employment, Lisa Dy, which you need to take to the Social Security office in Poughkeepsie, along with another letter issued by the International Students office attached with your I-20 and passport.
- You will have an application to fill out there, and then you will have to wait until your number is called for the interview.
- Once done with the interview, you will receive a confirmation letter from the Social Security office, which you need to take back to Lisa Dy in the Student Employment office for further processing. You’ll receive the Social Security Card in about two weeks (don’t share the number with anyone!). Once you have done the paperwork at the Employment office you will be registered to work on campus.
- For international students, the number of working hours are 20 per week.
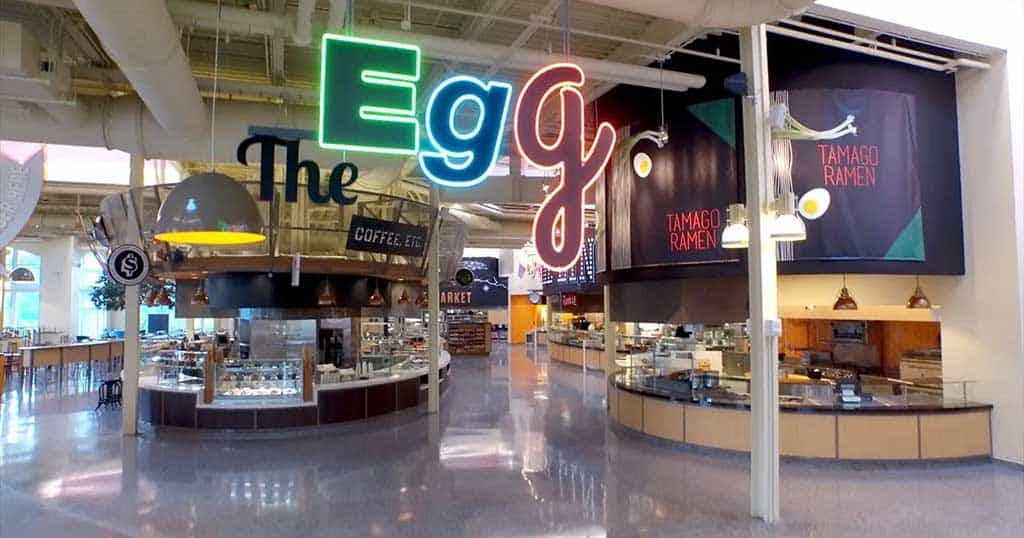
- There are various dining options at different kitchens in Roth Hall and at The Egg, the main student dining area on campus.
In freshman year, you will receive 20 Blue Points Daily, which refills when you get to 0 hours. As a sophomore, you will receive 10 Blue Points and 10 Green Points, both of which refill at 0 hours. Standard is 325 Gold Points for the entire semester; you can change the plan as needed.
- Blue Points are good for any production kitchen in Roth Hall (Grab-and-Go in Roth Hall, The Line, Pasta and Noodle Bar, or Salad Bar at The Egg and select items in the Marketplace at The Egg).
- Green Points are good for any production kitchen, similar to blue points, but also other locations in The Egg such as the Café and the Innovation Kitchen, as well as campus restaurants at approved times.
- Gold Points are good for any production kitchen, similar to blue points, but also include The “Yolk,” The Innovation Kitchen, or Barista Station at The Egg and all campus restaurants at approved times.
Be sure to download the GET app to check your point status.

Final Thoughts
As you go through the program, you will be in constant touch with your academic advisor to look at your progress and further plan your program.
And one last thing: if you’re looking to open an account in the U.S., the easiest ones are TD Bank, which comes on campus during orientation and have a branch 2–3 km (1.86 miles) from campus; Chase Bank; and a few others such as Bank of America.
If you have any questions, you can either call an admissions officer or contact me on my Instagram. I look forward to seeing you in your chef whites at the Culinary Institute of America. GO CIA!
Also, if you want to know more about my experience at CIA, go to my CIA blog article, My First Month at the Majestic CIA.
International Students
Learn more about our degree and certificate options at CIA.


